Want to know how to declutter a closet? Here’s what I did with my very messy, overstuffed, and badly designed closet.
Why Bother Decluttering?
Before I get started, let’s talk about why you should even bother in the first place. After all, you’ve probably lived with the chaotic mess long enough that you have a system. I know I did. I would only wear the clothes that were at the front of the closet, or, in the case of tee-shirts, on top of the pile.
This became apparent on laundry days as I found myself washing the same things over and over. My husband’s side of the closet was no better. After buying a new white shirt for a recent funeral, clearing out the closet unearthed three perfectly good ones he forgot he had.
Finding lost or forgotten items is reason in itself for getting the job done. But much better than that, is the peace and calmness a tidy and organized closet brings. Added to that, it makes putting laundry away a breeze instead of feeling like a game of Tetris.
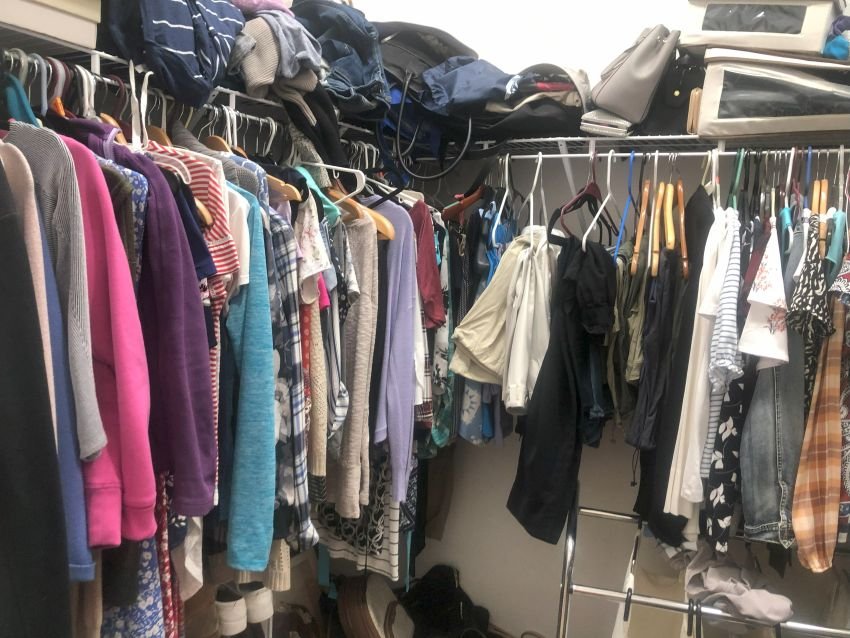
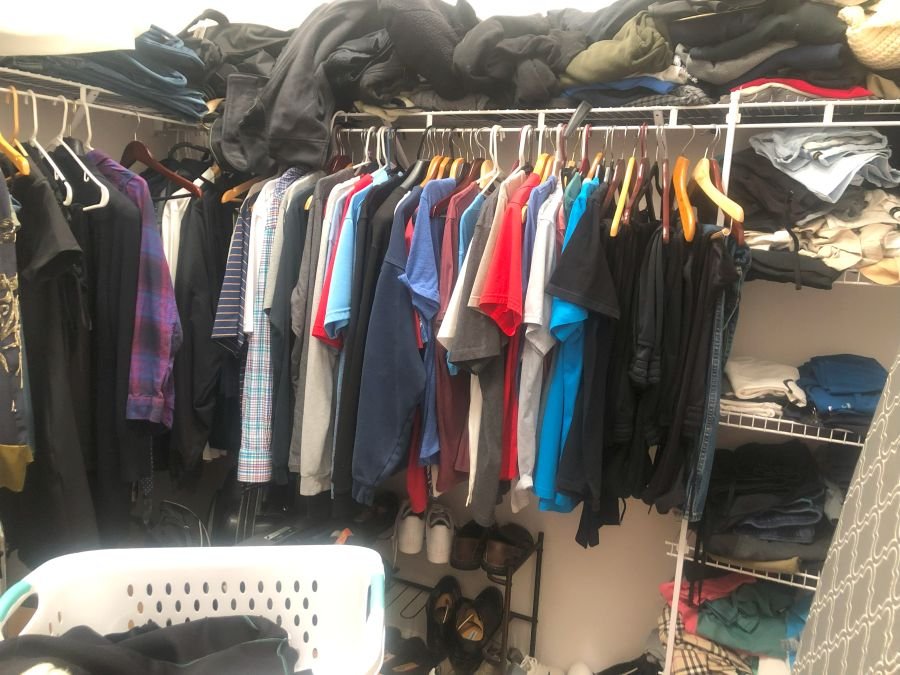
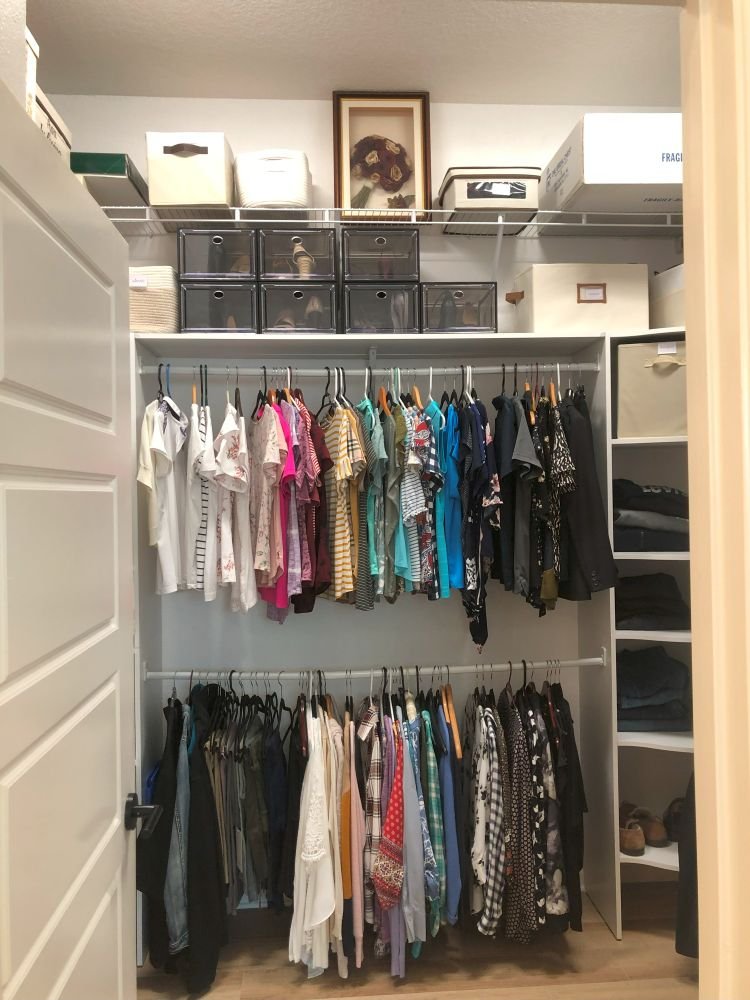
My Closet Before Decluttering
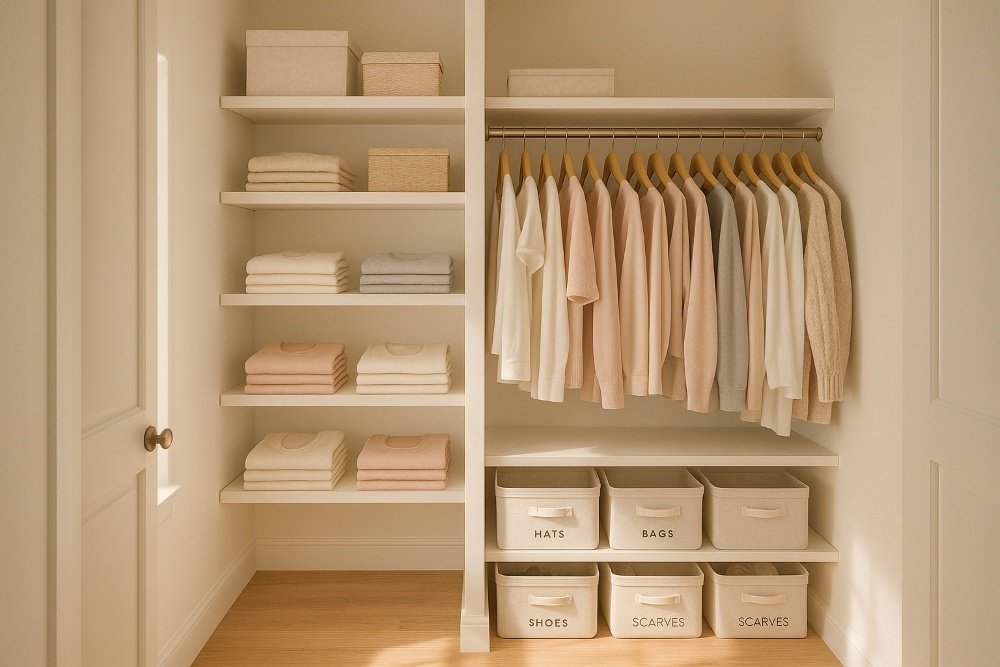
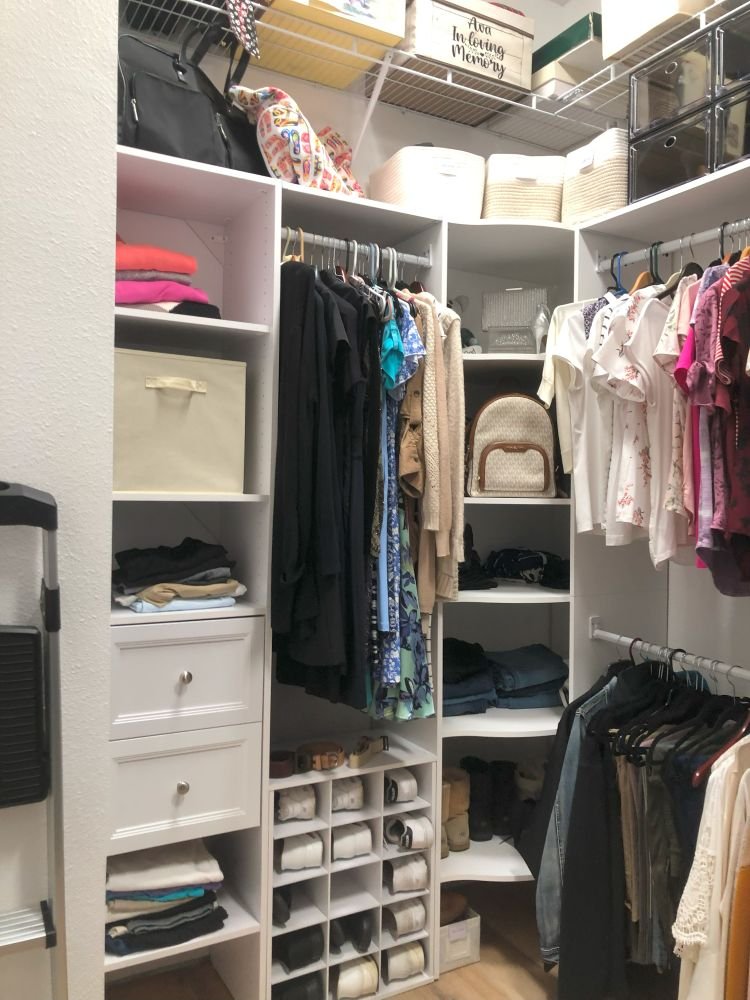
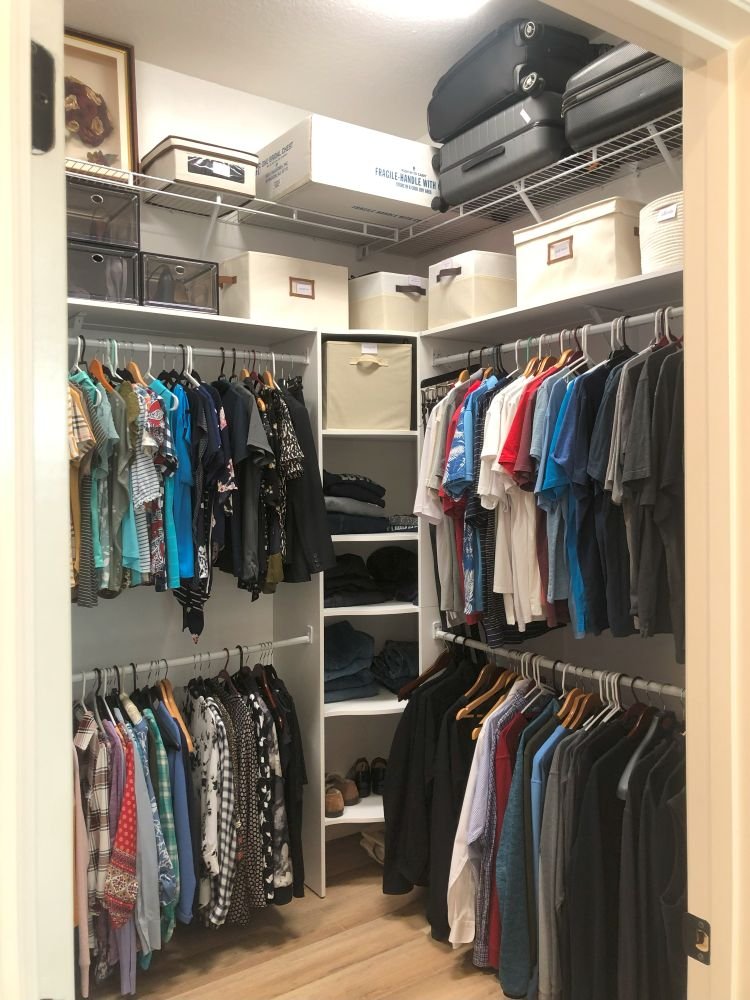
My Closet After Decluttering
Realizing the Need to Declutter a Closet
Anyone would think I only had a very small selection of clothes to choose from, yet why was it so full? So, I decided to take stock and have a good sort out. I know this sounds like a huge pain, but it was immensely beneficial. It made organizing the clothes I had left much easier, and I could actually see, and get to, all of them. Now when I walk into my uncluttered closet it makes me feel happy instead of stressing out about what to wear.
Preparing to Declutter
First, identify an area where you can dump the entire contents of your closet. For me, my guest bedroom made the most sense. You could use your main bedroom, but you’d better be ready to get the whole job done in a day. I was also planning on adding new shelving, so I needed somewhere to store things for a few days.
Whichever area you choose, ensure it is clutter-free and as clear as possible. Next get plenty of trash bags, donation boxes, and maybe a mirror for trying clothes on.
Lastly, before you start taking anything out, have a good look at your closet and decide what, if anything, needs changing. Pay particular attention to what’s failing. Below is an example of my wish/hit list:
Closet Wish/Hit List
- Too many clothes, shoes & bags
- Place to put suitcases
- Where to store out-of-season clothes
- Not enough hanging space
- Keep items off the floor (bags and shoes)
- Not making use of the full height of the closet
- No drawers or space to put folded clothes
The Decluttering Process
Now I had identified exactly what I wanted from my closet, it was time to get started on decluttering.
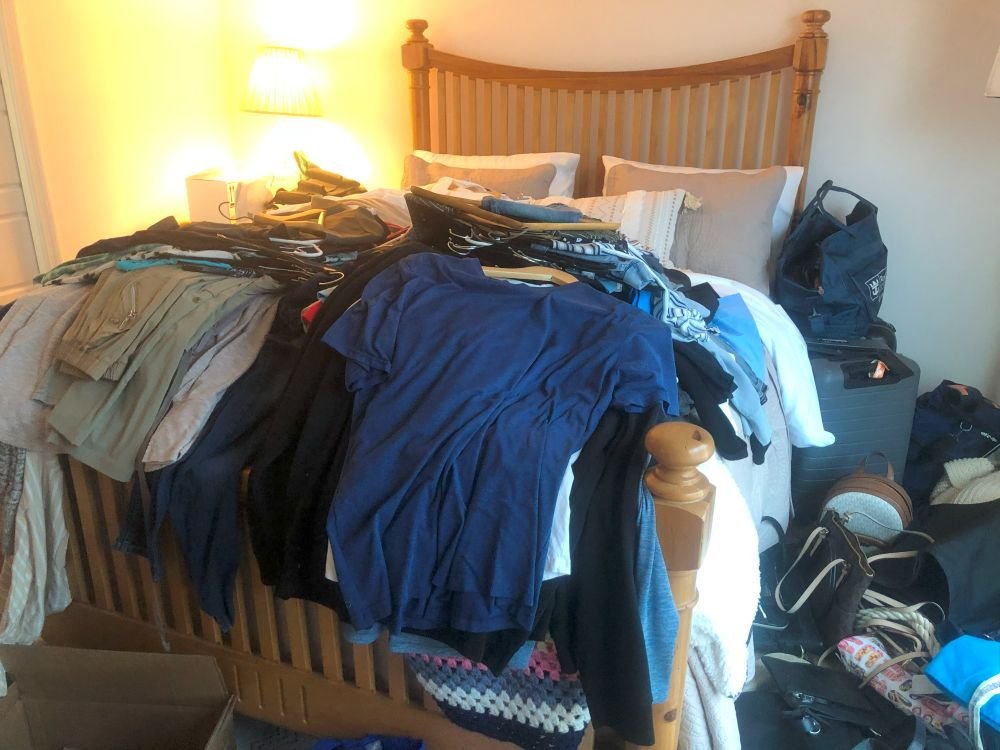
I completely emptied my entire closet – and I mean ALL of it. But, before you start dumping it all out, here’s a top tip I wish I had done first. Don’t just put everything into one massive pile (like I did) try to create categories as you go.
For instance, put all short-sleeved tops together, long sleeves in another pile, and bottoms in another. Shoes should have their own area, I put these in suitcases, and bags and accessories on their own. This makes sorting out a whole lot easier and it’s what I wish I had done myself.
Don’t forget to leave a clear area for sorting and assessing each item. Before you start sorting and putting things back though, take another look at your wish/hit list and see what you can do to address these issues. It may be as simple as adding additional shelving or storing items in baskets or bins.
Organizing Your Closet
Although my closet was a reasonable size, it only had one height shelving rail and had a lot of high space that wasn’t used. Luckily my husband is quite the handyman so a quick trip to Home Depot fixed all our issues.
Don’t worry, you don’t have to redesign your whole closet to make a difference. It’s just something that we badly needed to do. For that reason, I’m only including the steps it took to declutter the closet here. For anything related to organizing and structural changes we made, you can find that on my page on how to organize a closet.
Sorting Through the Chaos
With everything in one place, I had a quick rummage to identify anything that didn’t belong in my closet. Somehow once an area is messy, it attracts all those items I can’t be bothered to put away. I put them to one side ready to put back in their proper place or get rid of them. You’d be surprised at what is lurking in your closet, taking up valuable space.
Now the real decluttering starts.
I’d like to say that I grouped my clothes into categories as I emptied my closet and was able to go through each category one by one. But that isn’t true. Remember, I just dumped it all into one big pile. So, I had to add a step here of sorting that huge pile of clothes into relevant groups. These were my groups:
My Categories
- Short-sleeved tops
- Long-sleeved tops
- Shorts
- Pants
- Dresses
Husband’s Categories
- Short-sleeved tops
- Long-sleeved tops
- Shorts
- Pants
But, as I mentioned earlier, it’s much easier if you group everything as you empty your closet.
Questions to Consider When Decluttering a Closet
The goal here is to make quick decisions on what to keep, donate, and get rid of. Use this quick cheat sheet on how to make those decisions.
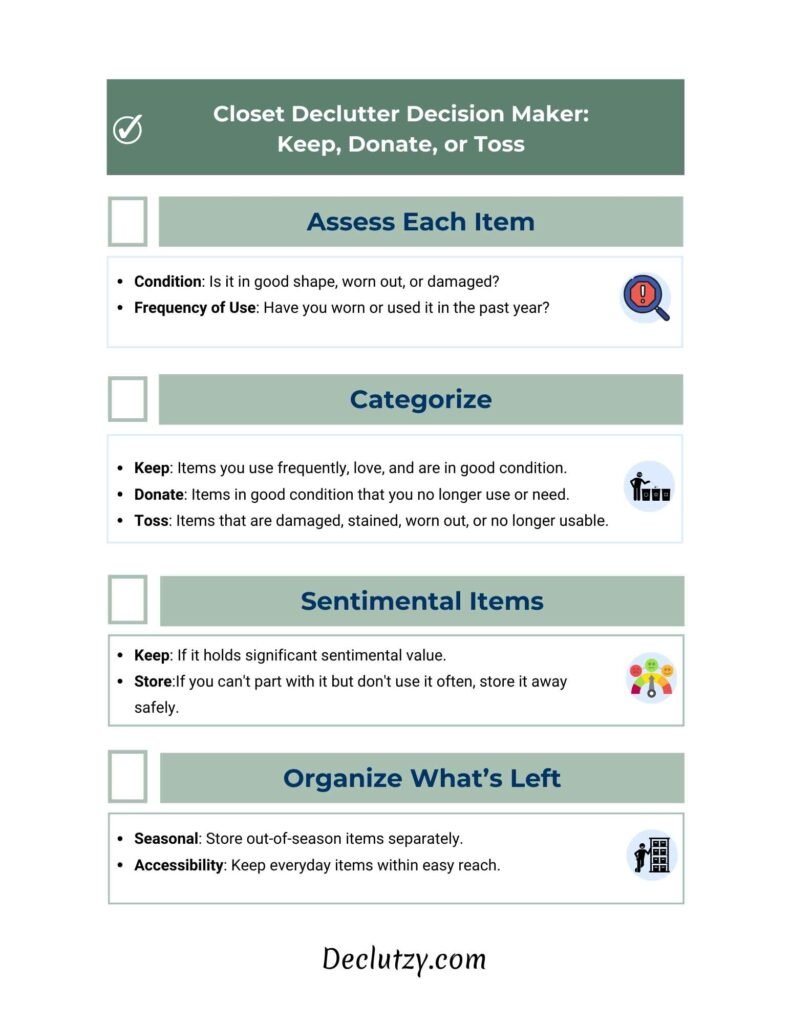
Download your cheat sheet here.
I examined each piece of clothing using the above criteria as a guide. The clothes I wore frequently were easy; they went straight to the keep pile. I also made sure they were kept aside as they needed to be easily accessible. For everything else, I checked its condition and how often I had worn or used it in the past year.
How to Declutter a Closet and Handling Sentimental Items
If you’re anything like me, you’ve probably got some clothes that hold emotional value. For me, it’s the personalized tee shirt I love that has my dog’s name on from when we used to compete. She’s no longer with us so I don’t need it anymore, but I could never part with it. I also have a lot of Hard Rock Cafe tee shirts from around the world that are reminders of our travels.
Although I don’t want to get rid of any of these items, I also don’t want them hanging in my closet taking up valuable space. So, I keep them in decorative storage bins at the top of my closet. I may be creative one day and make something with them, such as a quilt or tote bag, but for now, I know where they are, and they aren’t in my way.
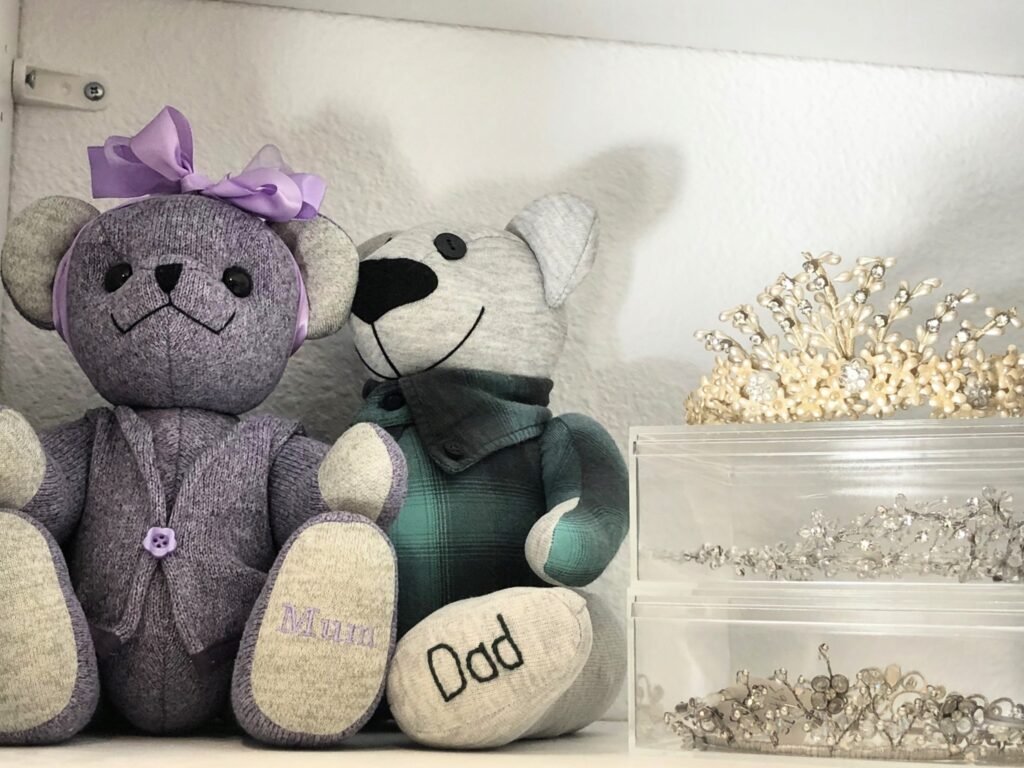
I also found mine and my mum’s wedding tiaras along with some other items of sentimental value stuffed in my closet. For this, I decided to put them on display on one of the shelves. Given that I had so much more room now it made sense.
The adorable memory bears in the photo were made from my late mom’s favorite clothes. I had them created by Tammy Bears—she does a wonderful job turning sentimental items into keepsakes you can actually hug.
Tammy Bears
Putting Everything Back
Once you’ve finished the decluttering process, you’re ready to put everything in the “keep” pile back. Well, almost. Before you do, give your closet a thorough cleaning and fix anything that’s broken. You might even want to give it a fresh coat of paint. Don’t miss this opportunity. Trust me, you’re not going to want to empty it again anytime soon.
Done all that? Congratulations, you’ve done all the hard work and are ready to put everything back. To stop you from getting in the same mess as before, create a system of how you want your clothes organized. For example, on one side of the closet I had my short-sleeved tops on the top rack and my long-sleeved tops, as well as my pants, on the lower rack. I repeated this on the other side of the closet for my husband.
I had my sweaters, sweatpants, and jeans folded on the shelves and everything else was labeled in containers. All bags are stored on the top shelves and shoes are either in shoe cubes or in under-bed storage containers.

Implementing a Decluttering Routine
I was so pleased with how everything turned out but didn’t want it to become cluttered again. To avoid this, I set up a simple routine to help keep it organized. For me, I find it works best if I do this on the days that I do laundry.
When putting clothes away, I take a few minutes to tidy up, pick things up off the floor, and return anything to the top shelves that I may have used. I also swap out my summer and winter clothes at the end of each season.
And that’s it, a simple and effective way of getting more space in your closet by getting rid of clutter.